Wednesday, November 22, 2017

Rule of Thirds

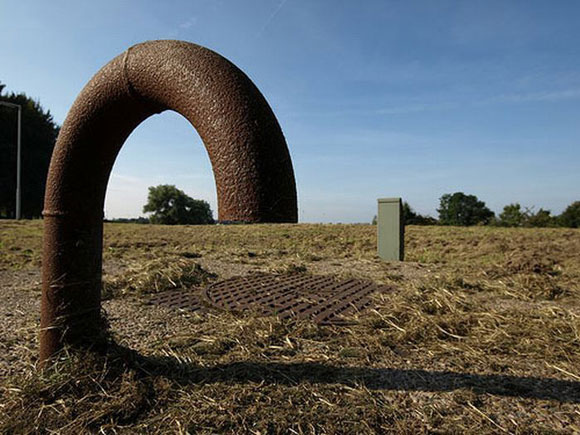
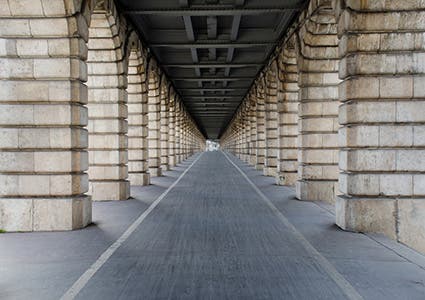
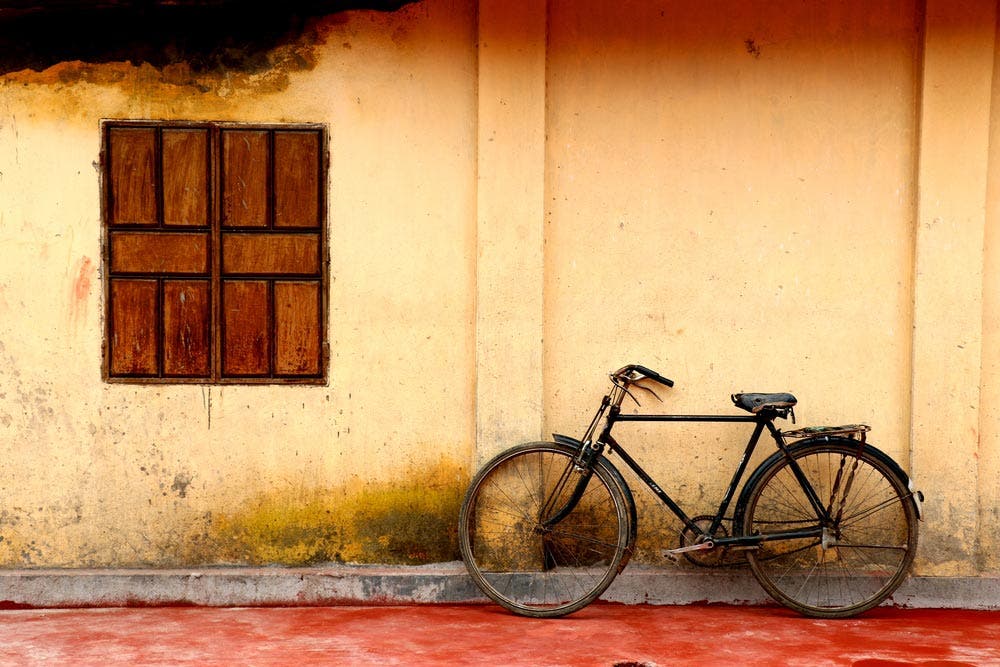
The basic understanding of the Rule of Thirds is if you place points of interest in the intersections or along the lines that your photo becomes more balanced and will enable a viewer of the image to interact with it more naturally.

In learning how to use the Rule of Thirds, it is important to ask yourself:
          1) What are the points of interest in this shot?
           
          2) Where am I intentionally placing them?

Image result for rule of thirds

Image result for rule of thirds

Image result for rule of thirds
The image above demonstrates an image NOT using the Rule of Thirds on top, and then applying the Rule of Thirds on the bottom. What difference do you notice?

Image result for rule of thirds vs no rule of thirds
NO Rule of Thirds            vs           WITH Rule of Thirds

 Related image 

Image result for rule of thirds


Monday, November 20, 2017

Mergers

Mergers are created when key parts of the main subjects overlap each other, touch another key element, or touch the sides of the frame.

There are 2 basic forms of mergers...


Good mergers help advance the theme of a photograph and keep the viewer’s eye moving in the right direction. They exert positive influences on the arrangement of elements, forming visual bonds between key parts of a composition.
These types of mergers are normally planned/staged by the photographer.
Related image 
Image result for mergers photography composition

Bad mergers disrupt the flow of a composition. They create jarring collisions between two or more compositional elements, interrupting the desired eye movement or adversely changing the motion.
Image result for mergers photography

Image result for mergers photography      Image result for mergers photography bad examples

Tuesday, November 14, 2017

Balance

Balance in photography is when an image has subject areas that look balanced, or even, throughout the composition. 

There are 2 different ways to do balance. 

1) Formal Balance, or Symmetrical

Formal (or Symmetrical) Balance is achieved when both sides of the image hold equal weight. 

As you can see by the two examples below. Each photograph is equally balanced if split down the middle, yet one is literally symmetrical and the other uses different elements of the composition to appear symmetrical.

Photograph by Matthew Peoples vs. Photography by Matthew Peoples

Symmetrical Passage With Pillars

Image result for symmetrical photo

2) Informal Balance, or Asymmetrical 

This type of balance is a bit more difficult to achieve. Many professional photographers prefer asymmetrical balance due to the complexity of the image. When an image is symmetrically balanced, that symmetry is initially obvious to the viewer. However, when an image is asymmetrically balanced, the viewer has to spend a little more time looking at the image in order to realize that fact. 
Asymmetrical Balance in Photo of Bicycle and Window

Instead of mirror images or an equal weight on each side of the photograph, the image is balanced by the creative use of size, tone, and form of the subjects within the composition. Each side of the photograph, in turn, becomes equally weighted regardless of their differences.

Image result for balance photography examples  Image result for balance photography examples 

Image result for balance photography examples


Wednesday, November 8, 2017

Viewpoint/Angle

Viewpoint is a way of looking at or thinking about something.

Before photographing your subject, take time to think about where you will shoot it from. Viewpoint has a massive impact on the composition of our photo, and as a result it can greatly affect the message that the shot conveys. Rather than just shooting from eye level, consider photographing from high above, down at ground level, from the side, from the back, from a long way away, from very close up, and so on.

Below are some examples of different viewpoints, or angles, used when taking photos.


Bird’s-eye View/Looking Down

When photographing a subject from above, it is known as a “bird’s-eye view”. This could be taken from up in the sky, such as when flying in a plane, or could simply be taken by standing on a ladder, slightly above your subject.


Image result for viewpoint photography looking down


Eye Level

This is the most common way to photograph a subject. After all, it is typically the way we regard most subjects in our day to day lives, especially other people. However, there are other ways you can take pictures at eye-level and make it look different or more interesting.

Photo by Neil Taylor


Getting Low Photographer creative shot

Worm’s-eye View/Looking Up

Photographing from below is sometimes referred to as “worm’s-eye view”, as if you were a worm looking up at the world around you. As you can imagine, this makes all subjects look very large, even if they are very small in reality


Photo by Mark Liebenberg


Wednesday, November 1, 2017

Today will be used to ensure that all of your pictures that you have been taking is on your computer. 

If you have not already, create a folder on your desktop with your name. 

Opening your folder from the desktop, create a new folder called "Composition Guidelines". This will be where you keep your photos.