Monday, December 17, 2018
Thursday, December 13, 2018
Rule of Thirds & Setting up the Grid
The basic understanding of the Rule of Thirds is if you place points of interest in the intersections or along the lines that your photo becomes more balanced and will enable a viewer of the image to interact with it more naturally.
In learning how to use the Rule of Thirds, it is important to ask yourself:
1) What are the points of interest in this shot?
2) Where am I intentionally placing them?


The image above demonstrates an image NOT using the Rule of Thirds on top, and then applying the Rule of Thirds on the bottom. What difference do you notice?
NO Rule of Thirds vs WITH Rule of Thirds
When taking photos of a person, It's a good idea to position them off to one side of the frame. This provides some "breathing space", can show the subject's environment, and stops the photo from looking like a mugshot.

--------------------------------------------------------------------------------------------------------------------------
How to Put a Grid on iPhone Camera
- Open the Settings app.
- Tap Photos & Camera (or just Camera if using iOS 11 or later).
- Find Grid and toggle it on.


- Return to the Camera app; you’ll see a faint grid over the capture frame
How to Put a Grid on Samsung Camera
- Open the Camera app.
- Tap the gear icon to display the setting for the camera
- Scroll down in the menu until you see "Grid"
- Select "3x3"
- Return to the Camera app; you'll see a fain grid over the capture frame
___________________________________________________________________________
HW: Take 4 Photos of Rule of Thirds and have them sent to yourself BEFORE CLASS!
If you have trouble sending them, please let me know before hand! My email is lwasserman@uascriminaljustice.org.
Tuesday, December 11, 2018
Friday, December 7, 2018
Balance/Symmetry
Balance in photography is when an image has subject areas that look balanced, or even, throughout the composition.
There are 2 different ways to do balance.
1) Formal Balance, or Symmetrical
Formal (or Symmetrical) Balance is achieved when both sides of the image hold equal weight.
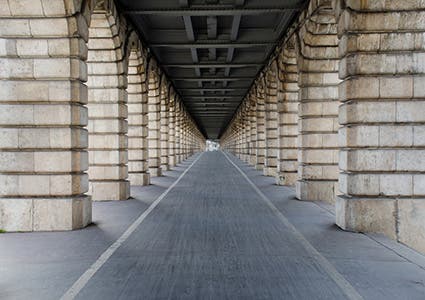
As you can see by the two examples below. Each photograph is equally balanced if split down the middle, yet one is literally symmetrical and the other uses different elements of the composition to appear symmetrical.


There are 2 different ways to do balance.
1) Formal Balance, or Symmetrical
Formal (or Symmetrical) Balance is achieved when both sides of the image hold equal weight.
As you can see by the two examples below. Each photograph is equally balanced if split down the middle, yet one is literally symmetrical and the other uses different elements of the composition to appear symmetrical.
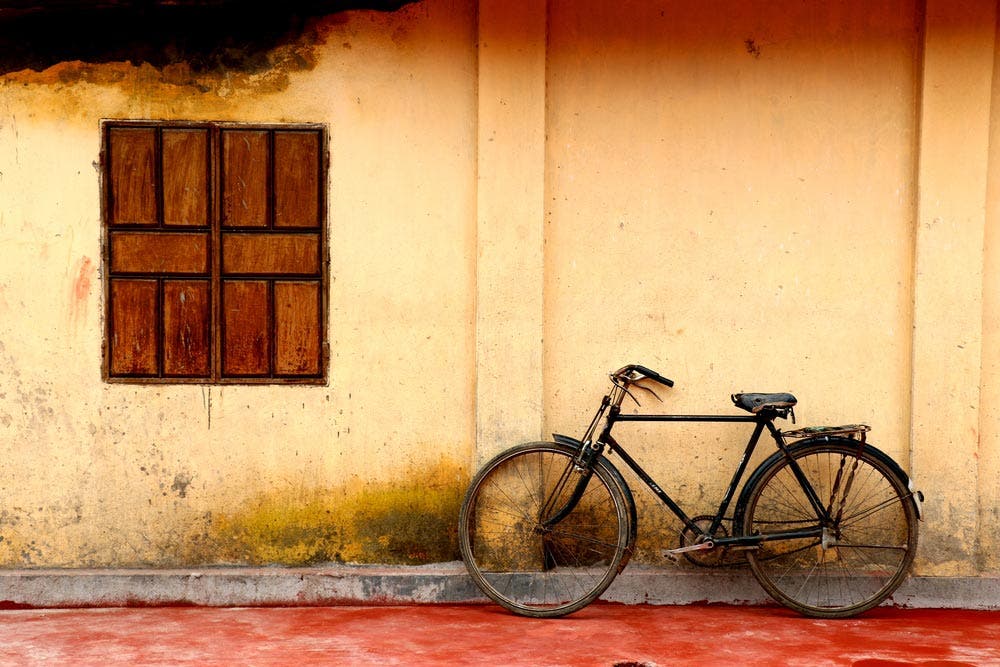
2) Informal Balance, or Asymmetrical
This type of balance is a bit more difficult to achieve. Many professional photographers prefer asymmetrical balance due to the complexity of the image. When an image is symmetrically balanced, that symmetry is initially obvious to the viewer. However, when an image is asymmetrically balanced, the viewer has to spend a little more time looking at the image in order to realize that fact.
Can you find the different parts of the image that balance each other out?
Instead of mirror images or an equal weight on each side of the photograph, the image is balanced by the creative use of size, tone, and form of the subjects within the composition. Each side of the photograph, in turn, becomes equally weighted regardless of their differences.
Wednesday, December 5, 2018
Subscribe to:
Posts (Atom)